I am ready.......it's been well over a week since I was able to craft. I was starting to get "sawdust envy", reading the builds on Model Ship World. now that I have the slip for the Gothenborg, it's time to get the show on the road. the first and second ribs were a no-brainer, firmly held in place with the fore mast plate cemented between them.
If you read the build slip log, you may have seen that I cemented a "shelf" on rib #9, in order to cement the aft lip of the deck platform. this will add more stability and cure any warpage that wasn't corrected by the slip. the following ribs, #3 - #8, were cemented in next. to further cure the warpage issue, I decided to use the same method, as I did for the Nordkap, using the deck platform as a template, and cementing the joices in place. it was bound with rubber bands and set back into the build slip until it dried.


When it was dry, I removed the deck platform, and cemented in the remaining ribs. ribs #8 and #9 held the mizzen mast plate in place, insuring that these two ribs are in alignment. note that I had cut the joices short of the ninth rib.....flush with #8. I added these two pieces in later, making sure they were flush with the aft deck plate shelf....sanding will smooth the deck surface later on. I will plank the deck before I cement in into place. when the deck is in place, I will burr into the fore and mizzen plates, giving them a sort of "pot" for the masts to sit in.


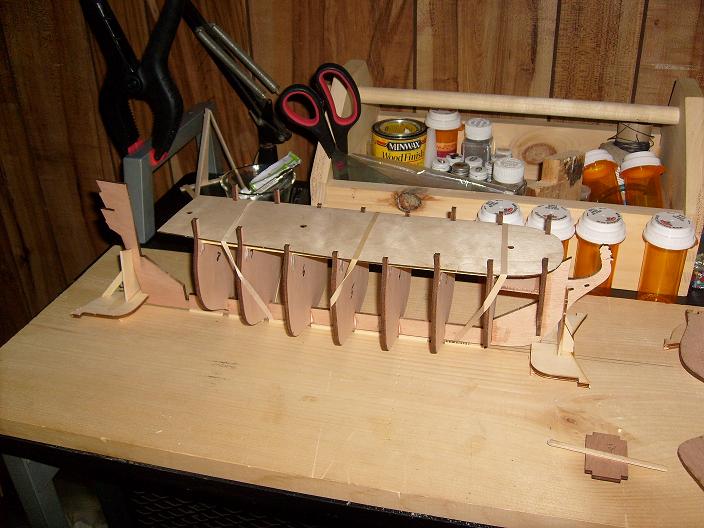
The stern stem had a small gap, so I had to clamp it. I had marked the center of the #10 rib, so the stem would be centered properly. I had also marked the center of the #9 rib, so it too could be centered, using the upper deck joices. after the joices were dry, the protruding ends of the joices was cut off and sanded flush with the ribs.......I'll do the finish sanding when I do the fairing of the hull, come planking time. more than likely, I will be planking the wall front of the aft deck, perhaps even defining a door or two. in the aft deck, there are two holes for stairways..........and maybe even enough room for a shuffle board.......just kidding! In the picture above, it looks as though #1 rib is in good alignment......look again......

yes........it is off a tad. this will be cured with the placement of the deck platform, but the rest of the ribs look really good! the build slip did it's job very well........better than I thought it would. when the deck is cemented in place, I may add joices between the first and second ribs, but it is really not necessary....just something that I want to do. perhaps it will add more stability to the bow.......just in case it needs it. Later, I put the deck back on, to end the session and allow it to dry over night. it was nice to see that I was correct, in my assessment of the #1 rib and how the deck platform would correct to slight outage that it has.


As you can see, I had a bit of confusion, in marking the center line. no matter, as I am just using it as a reference line anyway. I need to mark off the ribs in order to scale the planks, but I can do this off the ship since the rib stakes are marked out. I am also going to do something to simulate treenails as well.......what can I say.........it's the rave.............everyone's doing it!!! I'm off to a good start......I'm very happy with how cleanly it assembled, and accurately too! .......a very nice kit, indeed! AHOY!!!